OAuth2 Server PHP >= 5.3.9
Setting up the server example
In order to run this example on your localhost do the following
- run composer update to make sure you have
- twig template library
- bshaffer's oauth2 library
- make sure
public/examples/_015_oauth2_server/cachehas write permissions to create the compiled template files - make sure
public/examples/_015_oauth2_server/Auth/dbhas write permission, this is whereoauth.sqlitefile be created at run time
Now that you are ready, lets look at the example

To look at the server start from the client app here
This API Server is made using the following php files/folders
- index.php (gateway)
- Server.php (auth)
- restler.php (framework)
- JsonFormat.php (format)
This API Server exposes the following URIs
GET  access    ⇠ Auth\Server::access()
GET  authorize ⇠ Auth\Server::authorize()
POST authorize ⇠ Auth\Server::postAuthorize()
POST grant     ⇠ Auth\Server::postGrant()
This example is part 2 in a 2 part example that shows how Restler can be integrated with the popular OAuth 2.0 Server library. This section -- the "server" -- focuses on enabling a Restler server to play the role of an OAuth authorization and authentication server.
If you're not familiar with OAuth, it's worth familiarizing yourself with the basics and in particular understanding the various workflow that OAuth 2.0 offers. The following two links may help:
- Official OAuth Specification: a bit dry but if you want the "facts" they're there.
- OAuth2 Simplified: a nicely summarized overview of how to think through the key aspects of OAuth 2.0
The role of the server application in OAuth is:
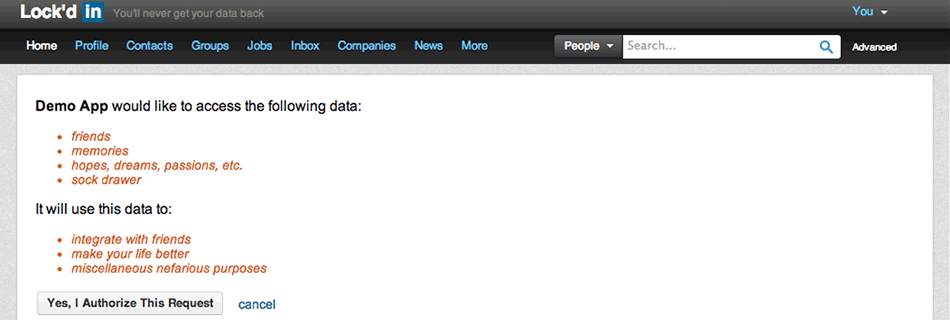
- Authorization: providing an authorization screen to the user with a set of permissions listed along with an "allow" button to allow the user to grant the client application these permissions.
- Authentication: validating the authorization information sent by the client application and then passing along the entitlements granted onto the Restler iAuthenticate system
It's important to understand that the workflow of asking for access varies by "grant type" in OAuth. The standard grant-types that OAuth 2.0 Server supports out-of-the-box are:
- Implicit: typically for browser based or mobile apps
- Authorization Code: typically for apps running on a server
- Password Credentials: typically used for apps that are owned by the same organization as the OAuth service provider (aka, the Twitter client, etc.)
- Client Credentials: used by client's who want to update meta information about their site (URL's, logo's, etc.)
- JWT Auth Grant: the client submits a JSON Web Token in a request to the token endpoint. An access token (without a refresh token) is then returned directly.
- Refresh Token: client can submit refresh token and receive a new access token
Storage
The first thing you will need to consider when setting up the server is what database technology you'd like to use to manage state. In this example the storage is managed in a local SQLite database but examples are given for mySQL, Mongo DB, Doctrine, and several other storage technologies. If there isn't an example template available then simply find the one that most closely resembles your technology (e.g., couchbase is similar to mongo, etc.) and spend the time to understand the required interfaces for a storage class. Creating your own storage object is relatively easy so don't use the lack of a pre-existing template as an excuse not move forward.
Once your storage object is ready to go just include it in the Server.php's constructor.
Grant Types
Grant types are configured in the Server.php file as well. In 99% of cases you'll use the built-in grant types. In these cases it's just a matter of adding one (or more) grant types in the constructor:
static::$server->addGrantType(
    new OAuth2\GrantType\AuthorizationCode(static::$storage)
);
Creating your own grant types is an advanced topic and will not be covered here but if you feel this is required for your project then reference the Extension Grants section in the OAuth2 Server's documentation.
Scope / Permissions
The term "scope" in OAuth refers to the amount of things your authorization will allow a client application to do. Some API's simply have a single scope for all client application but even in this case it's important to clearly clarify to the user what things the requesting client application will be able to do once the "approve button" has been pressed. In more complicated situations scope can be broken down into different roles. This granularity in terms of modifying "the ask" is great way to dramatically increase client's willingness to grant permissions.
To configure scope you will need to implement the OAuth2\Storage\ScopeInterface interface. More documentation can be
found here:
scope.
Workflow
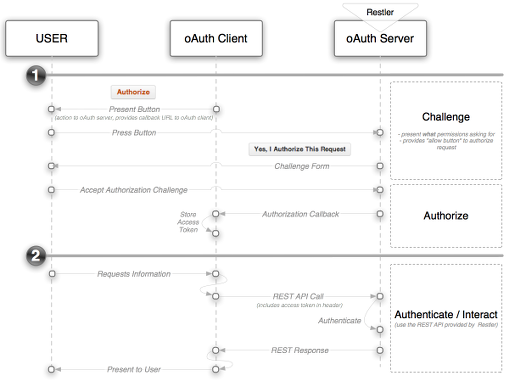
Now that your OAuth server is setup, it will now manage both authorization requests as well as validate
authentication credentials. The two flows are illustrated below:
Authorization
The specific flow for authorization will be dependant on the grant-type but in this documentation we will stick to describing the "authorization code" grant-type as this what the example app uses. The first step in this process is serving up authorization page to the user. This takes advantage of Restler's built-in support for custom views which includes twig templating and only requires that you point the API to a Twig template file. For example:
@format HtmlFormat
@view oauth2/server/authorize.twig
The @view and @format comments above the authorize method will serve the date through right template(view) file out to
the user. Following a user granting authorization, the server will use the client application's callback function to
pass back an access token.
Authentication
For any Restler resources which require authentication, the OAuth server will use the 'code' query parameter and compare that to it's internal records to validate that the user has the appropriate permissions.
Note:- there is an optional parameter on the server that allows the Access Token to be passed as a header variable instead of a query parameter.
In Conclusion
Many people are experientially familiar with OAuth clients either as a user who has granted apps permissions or as a developer who has downloaded one of many OAuth clients to get at social data from sources like Twitter, Facebook, Foursquare, etc. The server side of the interaction is less familiar yet it needs to be the primary focus for any RESTful API that imagines itself as having data of which other applications would benefit from having access to your data. Brett Shaffers's OAuth2 Server solution focuses on the server side of the interaction but provides both client and server components and both are now readily available to Restler customers who want to offer or connect-into the world of OAuth2.
